Whistle Home Etsy Store Contact Facebook About Whistle Custom Services Free Items Contact Blog facebook Pinterest

Followers

Monday, November 12, 2012

Tunnel Time

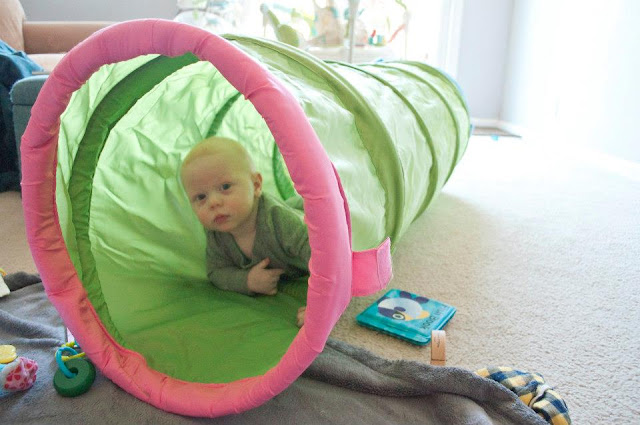
My growing boy is all about getting into things. I wanted to try and find a new outlet for him instead of climbing in our shelves. (Which he still loves to do still) For the $15 price tag this tunnel was a great find. My little man wasn't afraid to go through it when we got it open and figured out how to do it on his own in minutes. Now after having it for a few weeks he loves to just go through it on his own or play peek a boo with us.


Positives:
It closes up and opens easy
Small and easy to store once closed
Soft with no sharp edges or hard spots

Negatives:
Makes my house seem messy..er when it is out


You looking at me mom?


Tuesday, November 6, 2012

Halloween 2012

It's a little late but here are a few shots from our Halloween.

Yes I am that short next to my hubby.

Little Man C was Popeye. It was really easy to make his costume :)


Loving walking around at night.

I got my new iPhone 5 in the mail on Halloween . I left the film on so it had a weird glare in the pics and little man C wasn't used to the flash yet :)


Update on Cabinets

Remember way back when I posted on refinishing my kitchen cabinets?! yes about a month ago now. Well.... I am sad to say I am still working on them. Gasp!! I know it is taking forever. I attribute it to needing to wait for things to dry and a baby boy that always wants his mommy. I am hoping to have everything done by thanksgiving, then I will have a kitchen to be thankful for. :)

Here is our bathroom that I did before the kitchen... It went a lot faster.

So I figured I could at least give an update for now and some tips for those of you that are trying out the same thing.

Tips:
1. Use a liquid sandpaper (Citristrip gel) on the drawers and doors. I found that it was a lot better at striping the wood than just sanding. I really want to get a good even smooth stain on the most noticeable parts of my cabinets. I did not use it on the frame as I didn't want to deal with the mess. Just did it on the large sides that were built in and sanded the rest.
2. Use the mineral wash recommend to get all the leftovers off the wood before and after sanding. It helped just to make sure the all the citristrip was off before the stain. It was also very helpful to get stain and topcoat off my hands.
3. Use larger tape then 1". I use 1" painters tape to tape off areas and I still got paint on the walls. It was hard to get my tools in the small areas.
4. Use a smooth sponge. Now there are others that say to use a sock but I found that a smooth sponge worked so much better to get a smooth coat on the wood. The sock wood leave marks where the toe stitch was and was hard to get an even coat.
5. Remove all hardware (cabinet hinge's) and appliances. I asked mt husband to do this for me and he said it would be fine and I may have gotten stain on stuff ...oppps I know you may not care about stain on your hinges but I kinda wish I had taken the time to do it cause it isn't very clean of a look.

Thursday, November 1, 2012

Guest Post by Twist Me Pretty (Formally known as My Yellow Sandbox)

Hello!  I'm Abby from My Yellow Sandbox Twist Me Pretty.
My blog started out as My Yellow Sandbox.  It was originally a place to compile all the crafts and interior decor I saw and loved online.  Yes... before Pinterest!   As I happened upon a love of hairstyles and found my niche in this online world, I decided to change the name to Twist Me Pretty.  To celebrate the new name and look I've teamed up with my favorite shops and bloggers to bring you a massive giveaway.  A giveaway to top all giveaways.  There will be over $1,500 in prizes and over sixty five winners!  
 To enter the rafflecopter and see what exactly is up for grabs visit twistmepretty.com
You might find a little of this over there too... :-)

Monday, October 22, 2012

The Fall Season is coming up


It may be a little early but I am huge on preparing ahead of time.

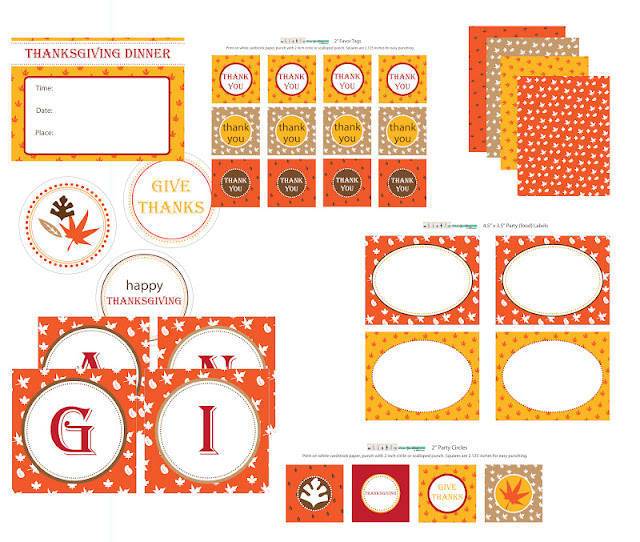
Here is a free printable for the Thanksgiving Holiday.

Thursday, October 18, 2012

Sili Squeeze review

I normally don't normally buy products and end up hating them... but this is one of them. As it is a newer product (I think) and there were not many product reviews out there for me to read I decided to take a chance on it. I thought "Oh yes this will be much better than the Little green bag I want to get" ... Boy was I wrong.

The spill proof nipple is way to hard for my 7 and a half month old to get anything out of. Then when I tried it it was way to hard for even me to get anything out. The company says that it is harder for me to do as it is designed for little mouths and that little C just needed to learn how to use it. After using the squeeze with ease nipple I still have complaints. Yes Little C likes it for the first few bites but then after the silicone bag is no longer full he cannot get anything else out. It was too hard for him to suck the bottom portion out for the container because of the shape.

He has used the regular store bought pouches that come with food in them and has had no problem getting the entire portion out of the bag. Yes the Sili Squeeze may be better for an older child but at that point a child can have slices of apples and not need apple sauce.

I would say this product was a major let down for me and not worth the money at all. I wish I had more pictures of the extremely fussy baby with this product but as I said he was EXTREMELY FUSSY!! I would be too if I was hungry and the food would just not get in my tummy. :)

Friday, October 12, 2012

Baby Boy Boots


I really want something for my little mans feet during the semi cold season. I know that when I have just socks on my feet are still cold so why would he be any different?!

I have a box full of old clothes that are no longer wearable and decided it was the best place to go for fabric. YEP! that old flannel shirt from high school is perfect!!

After taking off the sleeves and cutting out my pattern I pinned my inner and outer fabric together.

I am not the best at sewing so I try to make things a little easier when I can. The proper way to do this pattern is to sew the inner fabric all together to form the liner and then sew it to the top of the outer liner..I have tried this before and I find my two pieces didn't fit well together and it was very difficult because of the size of the shoes.

I sewed the inner and outer pieces together and then sewed the boot/slipper together. I decided I wanted the fabric seems on the outside of the boot to make it a little more rugged for my boy.

I didn't want him to look like he was wearing girlie shoes.

Add a little elastic to the heal to keep those bad boys on and TA DA ... done

The stretchy jersey fabric on the inside is nice and soft on his skin and the flannel on the outside will help to keep in the warmth.

Next I shall make some for when it gets really cold. :)

**We have carpet in most of our home right now but hope to upgrade to all wood very soon. When that happens I am going to add a design in hot glue on the bottom of all the shoes I make so my little one has a some grip.
Tuesday, October 9, 2012

Middle of the night leaks


Little C officially can roll over as of a month ago and with the new found skills comes some complications.

He is now a tummy sleeper, despite my efforts.

Now that he sleeps on his tummy he has a problem with his diaper leaking and getting all over the place.


He doesn't take a pacifier it just happen to be in the crib

He is not one to sleep through it and will not go back to sleep until I take off his diaper. After the diaper is off he goes back to sleep and sleeps through me putting his diaper on and new pants and putting a blanket under him (all while he is on his still laying on his tummy, putting a diaper on butt up is not a smooth operation).

He does sleep through the night so when he is awake for more then a short cry I know I am in for another clean up.

I thought it was the costco diapers as I have noticed that if you put pressure on the diaper it will leak through the outside. Even when it barely has anything in it. I am not a fan of having to take of his jumper seat and wash it.

I switched over to the Luvs as they are the cheaper of the better diapers. I like them better then pampers due to the pampers being too fragrant and better then costco because they are softer and the straps are thinner making less irritation on my sons legs from movement and rubbing. I find the costco diapers run his leg and tummy raw from the large rough straps.


After the luvs leaked overnight I decided it was time to pay the price and try the Huggies Overnight diapers. They worked great!!!!

No he does not have a pink blanket, it was mine as a baby and he loves that it is silky. I have not found any blanket that is all silky for him. Also yes he sleeps with blankets in his face... I have tried to pull them away but he just keeps pulling them back in his face.... don't look at the fact that I don't have his sheets back on his bed yet hehe

Saturday, October 6, 2012

Chicco Poly Highchair

There are a lot of highchairs out there that are great looking that I may have preferred but not at the $250 price tag they came with.

We got our Chicco Polly Highchair for $107 (normally $160) at Buy Buy Baby.


I love the adjustable height and chair slope. I also like that the seat was a little larger than some of the other options. We like to move it next to us while we watch TV and it is incredibly easy since its legs fold in so easy.


A lot of people complain that they can't get it clean and that its not washable but if you clean it after each feeding (which we don't always do...there is food on it in the pictures, dang!!) or just the big spills then you will be fine. My little man does love to grab the straps and suck on them while he has food in his mouth (which is why I put one of the straps behind the top layer pad) and food gets in it. It comes out fine but I have to take a little time to clean that part really well.

All in all I love it and Little C loves it too. Great deal for the $107 :)

Friday, October 5, 2012

Shooting in RAW

WE have a Nikon 5000 DSLR camera and I have yet to really figure out all the functions on it and learn how to use it. I decided to take some pictures of little C in camera RAW to see the difference. I really really LOVE IT!! 


I didn't do any editing to the pictures besides the adjustment in RAW.


I didn't want to use the auto focus as it takes longer for the camera to take the picture and I could miss out on a great shot... Sadly that means I am not always focused on the right thing.... fail!


Mommy my cartoons are back on... give me a minute

Mom..... Please figure out how to get me in focus

Getting better

Better

Perfect. Thanks MOM :)


All in all I find camera RAW is great but I haven't tested it out at night when I usually find my pictures look the worst and the time I usually can take pictures. Once I have it all figured out I will share the must have info for the Nikon.

Related Posts Plugin for WordPress, Blogger...